
3 Ways to Record Your Guitar in GarageBand

GarageBand is one of the best Digital Audio Workstations (DAW) in recent times.
It offers a perfect blend of sophistication and usability.
Although GarageBand is an extraction of the mighty Logic Pro X, this audio software developed by Apple cares to include all the important features of Logic while making the interface more friendly at the same time.
A major part of the expertise in GarageBand in plugins and software instruments.
While the GarageBand has the all-encompassing feature of Musical Typing which you can use to play any instrument tone on the virtual keyboard, the application also allows users to plug in their guitars and MIDI instruments to record tracks and later edit and master them.
There are several smart ways to record your guitar on GarageBand.
All the processes make sure that there is no additional noise in the audio quality of the recordings.
A major quality indicator of the audio also depends on the quality of the hardware you use.
The most common way of connecting an electric guitar is through an audio interface:
The GarageBand guide by Apple also gives you a list of ways in which you can connect your guitar to the GarageBand application.
Although virtual amplifiers, processors, and pedalboards are all well provided in GarageBand, only a musician knows how much of a difference tangible devices make to the overall audio effect.
Therefore, if you are plugging in your guitar into the application, you will be able to enjoy the benefits of all those accessories.
The process to connect a guitar using only an audio interface is given below:
An audio interface is a device that acts as a connector between a guitar and an electronic device.
What it essentially does is convert sound waves into digital signals that the computer will be able to recognize.
Audio interfaces come in various connector methods.
They are as follows: Thunderbolt connector, USB Connector, USB – C connector, and FireWire 800 connector.
All desktops have sockets to accommodate all these connectors.
After you have established a connection between the audio interface and your PC, you will need to make a connection from the audio interface to the electric guitar that you will be using to record.
For this, you will need a ¼ inch tip-sleeve instrument cable or what musicians commonly call the lead wire.
Plug one end in the interface and the other end into the guitar.
Alternatively, you can make a direct connection between the electric guitar and your desktop provided you have the right gear for it.
You will need a Stereo mini plug connector and an audio input port on your desktop.
This cable will have a lead wire connector at one end that will go into the guitar and an AUX end that will go into the input port of your desktop.
If you use this method of connection, choose the Built-In Input as the track’s input source in GarageBand.
As a word of caution, audio interfaces of different companies have different compatibility features and settings.
Therefore, it is always better to check the manufacturer’s guide in case you have to install additional drives to make the interface work
After you have made the connection, now comes the turn to record whatever you are playing on the guitar.
For this, the first thing that you need to do is choose the input track that you want to record in.
Monitoring is an optional feature.
These are audio outputs only to assist in you hearing whatever you are playing.
Monitors are used in every live performance.
Every musician has a monitor near him such that he can control the audio levels and most importantly hear what he is playing.
In GarageBand as well, you have monitors.
It is recommended to use monitors whenever you want to record something.
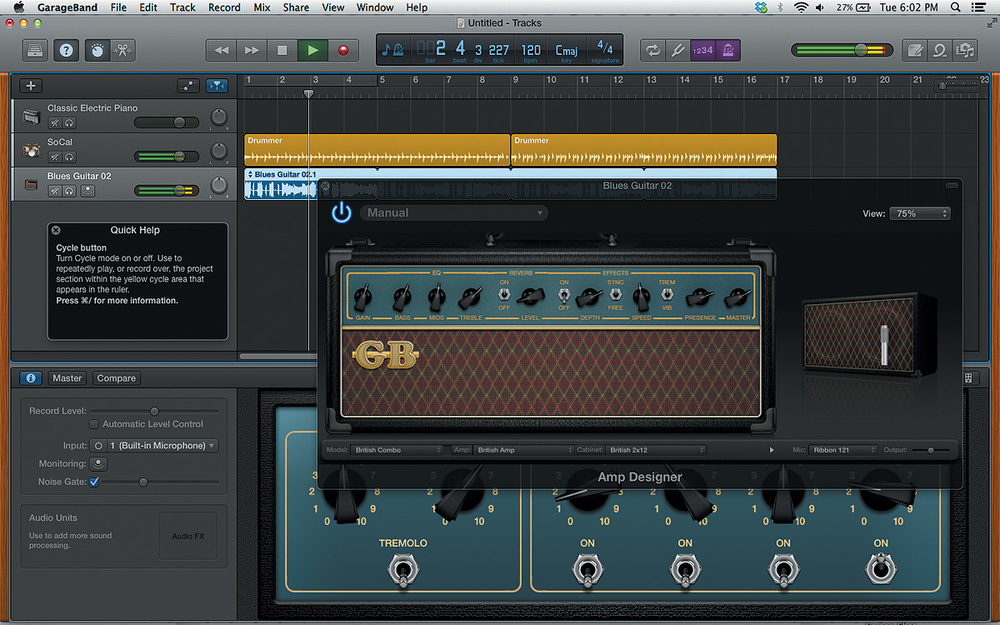
Open up the Smart Controls Panel from the top left corner of your screen. Navigate to the Recording Settings Area from where you will be able to control input settings.
As mentioned before, if your guitar is connected directly to your computer via the audio input port, choose the Built-In Input.
If you have an audio interface connected to the PC, choose the channel number as your input settings.
Choose the USB Port if the guitar is connected to the USB Port.
If these input settings do not appear automatically, you can manually open it by clicking on Preferences > Audio/MIDI > Audio Input pop-up > audio interface.
Next comes the divide between Mono and Stereo channels.
Mono has only one channel (equal volume on either side).
Select Mono for Monophonic channels> For stereo instruments, select the Stereo channel.
Stereo input has two channels such that you can manipulate the audio levels on either side.
Before starting your recording make sure to drag the Recording Level Slider to high.
Dimming the input volume will give you very little flexibility to control the audio and you will just be left with the guitar’s volume knob to control the intensity of the audio.
Finally, click on the Monitoring button to switch it on. An orange light will come on indicating it is on. Test it by playing something on the guitar.
You will be able to hear what you are playing.
It is recommended to use headphones to listen to Monitoring as speaker monitoring might add feedback to the audio.
Finally, press the Record button and start playing!
While this is the standard way of recording guitar or any other plugin instrument in GarageBand, there are other gears that are used frequently to plug in and record. Some of them will be discussed here.
You can choose any of the following depending on the gear you have available.
Want to learn to play guitar? check out our #1 recommendation by clicking below


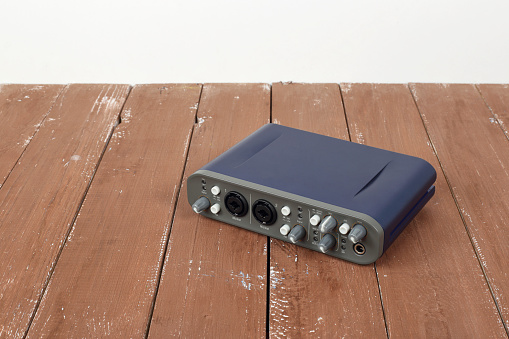
Small Portable audio interfaces are trending now.
They physically look not bigger than your TV remote.
One end has a lead input that connects to your guitar while the other end has a USB output that goes into your desktop.
If you are using one plugin instrument at a time, this is one of the best budget options and the audio quality in recordings is also quite commendable.
There are models available in the market. The iRig from Ikea is a trusted option.
Even when you are using iPads and iPhones, these small interfaces are much easier to maintain and carry around.
The iRig also has an additional XLR for attaching a microphone. Good quality interfaces give you clean tones without noise and feedback.
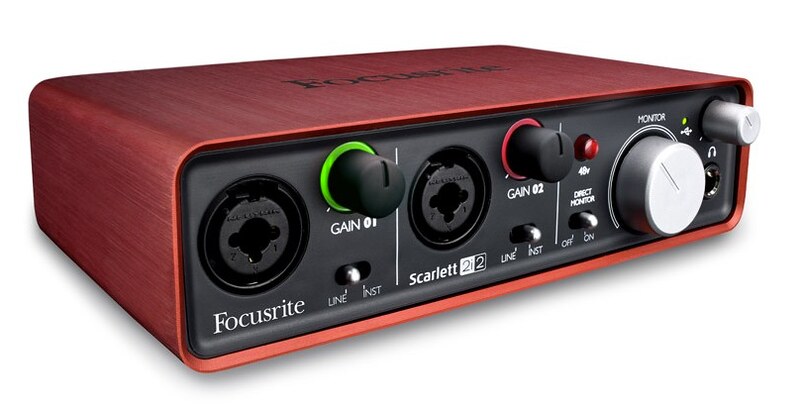
The Focusrite Scarlett 2i2 audio interface is one of the best interfaces that musicians use to connect guitars.
This will give you much better quality audios as compared to connecting USB to XLR cables as well as portable ones.
It goes without saying that these devices do not come in cheap.
However, it is worth the money.
The hardware comes with knobs that allow you to control gain and Monitor levels physically. GarageBand is quick to recognize high-quality popular interfaces automatically.
Once you have made the connection, hit the record button, and belt out your favourite tracks.
Getting a good recording, as mentioned before, mostly depends on the gear you are using.
Good gear costs money but they give you the value for it.
If you want professional studio-like guitar recordings, you will have to spend behind a good interface!
Author bio:

Dr. Robin Alexander
Dr. Robin Alexander, an MD Pathologist and passionate guitarist, combines his love for music and science. As a guitar enthusiast, he shares valuable insights and tips on guitar playing here at Guitarmetrics, helping musicians enhance their skills and enjoy their musical journey.


