Acoustic guitars have six strings, consisting of 4 wound bass strings and two plain treble ones. The bass strings are thicker, so they can hit lower notes which means they are made from core wire and then outer wire wrapped around it. The outer wire is usually made from 80/20 Bronze or Phosphor Bronze. If you don't own an acoustic guitar and want one, head over to the guitar store Pleasanton.
Changing your acoustic guitar strings is one of the best makeovers you could give to your guitar. In addition to your guitar looking brand new, playing it will also be a treat. It will feel lighter and produce sweeter melodies, just as it did the first time you purchased it. Many guitar owners must realize that their guitars may need restringing because the process is usually gradual. It may not make much difference until you restring it to discover a new revitalized feeling.
The windings of the wound bass tend to get gunked up with oil or dead skin cells from your fingers, stripping the guitar strings from their bright and crisp melodies since they no longer vibrate evenly. Naturally, you would want to avoid this and have your guitar play tunes to its fullest potential. Therefore, this article will tell you all you need to know about when to change the strings, the essential equipment required, and all the steps to restring an acoustic guitar. Let's get started.
How often should you change the strings?

The last thing a musician wants is their guitar string to break off in the middle of a performance or practice. To avoid this, it's better to change your strings beforehand. Change your acoustic guitar strings after every 100 hours of playing it because, by that time, they start getting worn out. Another rule of thumb is to change it every three months, even when it's not in use. It would be best if you did this because the elements and the moisture from your fingers will wear the strings even when you're not playing it.
Change them either after 100 hours of use or three months of sitting idly, whichever comes first. Here are some other signs that tell you you need to change the strings of your acoustic guitar:
-
Dull tone
New strings will sound crisp and clear, but when worn out, they will begin sounding dull and flat.
Many artists prefer mellow, but you should entirely avoid dull tunes. It just means that it's time to change strings.
-
Dirty
You leave behind bacteria from your fingers on the strings when you play them. Sometimes it's bacteria, sweat, or both. And when you play your guitar, you will notice that your hand motions are causing friction in the guitar. All the accumulated bacteria cause friction from your fingers, which is another sign indicating you need to change strings. You won't usually see dirt on them, but you can easily feel it when you play your guitar.
-
Splotchy strings
Discoloration on strings is common because of the collected oil from your fingers and the elements in the air. Over time they will become splotchy and discolored; that's your cue to change them. However, it is also hard to tell whether your strings may have changed color or if the shade differs from the original shade. You can determine this by comparing the strings you often use with the ones you don't. A difference in colors will indicate that it's time for a restring.
-
Not tuning
Worn-out strings will cause issues when trying to tune them. Tuning them will be easy, but they may return to not holding their tune after a couple of days.
If you find that they need to tune or the tune is not holding for more than just a few days, it's time for a change.
-
Stiff strings
If you feel that your strings have a stiffness to them while playing, the metal is starting to rust, making the strings feel stiff.
Good, new strings are usually bendable and flexible.
Essentials tools you will need

Now that we've established that your acoustic guitar needs restringing, it's time to assemble all the essential tools to undergo a successful restring process. Fortunately, you will only need a little gear for this job.
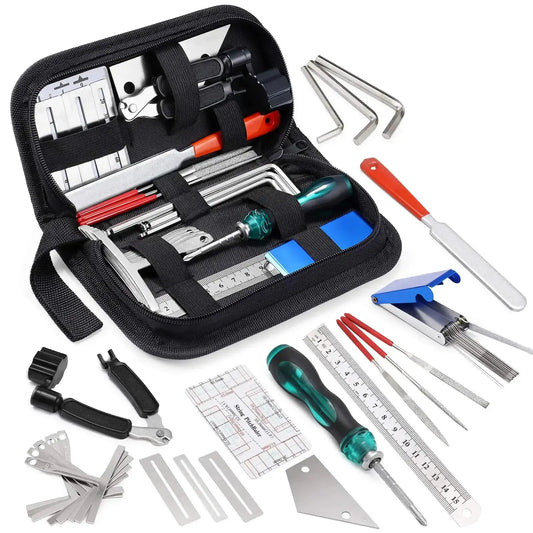
You'll require a fresh set of strings. If you're a beginner in changing your guitar strings, we advise using affordable light gauge strings in case they break while you're installing them. You'll need a string winder to help you save time, sturdy wire cutters, pliers, and a tuner to test your guitar tuning and put it back in place.
Restringing a guitar is a fairly basic task, but it is advised that you take it slow and steady, watching your hands because ends can be sharp. Younger ones should use the help of their parents or a grownup in the installation.
Now that we're equipped with everything to restring a guitar let's get into the installation steps.
Step 1: cut the old strings.

The first step is to slacken off your old strings using machine heads. This may take a little time, so to speed up the process, use either a manual spring winder or a motorized one since it'll get the job done much faster. Finally, now that you've loosened the strings up cut them with a pair of high-quality wire cutters since scissors will not even come close to effectively cutting acoustic guitar strings as well as a cutter would. Using scissors will only assist in the process of blunting them.
Step 2: removing the string pins

Fortunately, many string winners come with a tool that allows string pin removal.
Start by pulling each string out to release the string ball ends from the bridge. There's a tiny groove in each string; try not to miss it. The small groove is for each string to sit in, so install them the right way round when you fit your new strings with the groove pointing towards the neck of the guitar. Doing this is sometimes tricky, so use pliers or a cloth wrapped around the ends to avoid damaging the pins. Take the string pins and store them somewhere safe in case the need to use them arises again.
Step 3: remove string remnants

When you cut off the strings, it's natural that pieces will remain tangled up around your machine heads. Before installing new ones, you must first remove the string remnants. Use a set of pliers for effective removal, but watch out for your hands since the little remains are sharp and merciless.
Step 4: Installation

Now that you've removed your old strings, there's just one more step before you install ones. Your guitar's body, neck, and fretboard are more exposed now that the strings are removed, making it easier to clean thoroughly with a lint-free cloth. Over time, a lot of grime accumulated on the fretboard and body, and now it's the perfect time to clean it all. Use a few drops of lemon oil on a cloth, especially if your fretboard is dark wood, such as rosewood or ebony. Allow the lemon oil to soak up for about 30 seconds before you wipe it off.
Once that's all done, start installing your strings by threading the ball end of your first string into the hole in your guitar's bridge. Then proceed to push the string pin after it with the groove facing the neck.
Step 5: Factor in some slack

Fit the string through the hole in the machine head or tuning peg. While doing this, build slack into each string before tightening to have extra string left over to wrap around the tuner. Do this by holding the string at the machine head while making a 'karate chop' hand gesture where the neck is. Then run the string over the upper side of your hand.
Step 6: Secure the string.

Now that you've placed the right amount of slack, the next step is to secure the string for tightening. Start by feeding the tail around the tuner and then tuck it underneath the string. Pull the tail tight, facing upwards, to create a tight twist so the string can be held in place.
Step 7: Wind the strings

The strings are secure thanks to the tightened kink in the string at the machine head end under tension. The next step is to pull on the main body of the string and then turn the machine head to start winding the string. Ensure that the string tail stays underneath the central part of the string. Another factor to remember is ensuring that strings are wound to the inside of each machine head.
On an acoustic guitar top, three strings or the thickest strings will need adjusting by turning it in an anti-clockwise direction. As you do that, turn the bottom three strings or the thinnest strings in a clockwise direction. Your focus should be at least aiming for four to five windings on the tuner post with no overlaps. Repeat this process on the rest of the five strings.
Step 8: trim excess string

All of your strings are installed. Before you get to playing your guitar, it first needs tuning up. Do as you always do to tune your guitar and turn the tuners to get the right pitch. Remember to keep a thumb over string pins to prevent them from flying out since the full tension hasn't been reached. At times, the ball end rests on the end of the string pin, which often results in your strings popping out. It's time to take out the wire cutters and trim all excess string from the machine head. Safely dispose of all the excess, loose strings. You are now ready to play your brand-new, perfectly tuned guitar.
In conclusion
There are some essential things and steps you need to follow to restring your acoustic guitar. If your strings produce a mellow sound, there's too much friction, or even if you fear that your strings might break in the middle of practice or performance, that's your cue to start looking for the signs on whether your acoustic guitar strings need changing. There are many things to look out for, and we've talked about it all in this article. Once you've established that it's time for a restring, equip yourself with the right tools. These include a fresh set of strings, a string winder, sturdy wire cutters, pliers, and a tuner to test your guitar tuning. For installing the strings, be careful while handling them because the ends are sharp; if you're not careful, you can subject yourself to cuts. If you're a young guitarist, help someone older to help you in the process. Besides the mild cuts, installing strings is not a significant risk hazard and is also fairly easy. Once you've completed every step of the article, you can play your brand-new strings with no hindrances.
We hope this article proves informative and helps you restring your acoustic guitar. Thank you for reading!


