
Introduction:
Embarking on the guitar-playing adventure brings a wealth of musical opportunities. At its core, mastering guitar involves learning basic chords, the essential building blocks of countless songs in diverse styles. In this guide, we'll navigate the basics of guitar chords, examining their importance, techniques for playing them effectively, and tips to refine your chord-playing abilities. When you've got a few chords down, it's important to practice them with a song you enjoy playing. This will keep you motivated to practice your chords. Check out this article from Guitar Mammoth for a list of easy guitar songs, to find one you love. It lists the chords included in each song, so you can easily find a song you know the chords for.

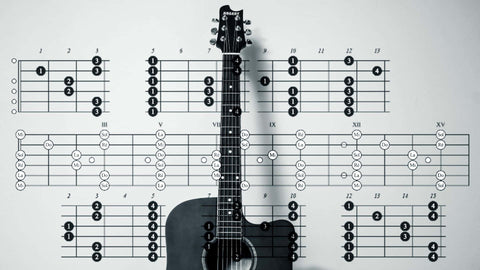
Understanding Basic Guitar Chords:

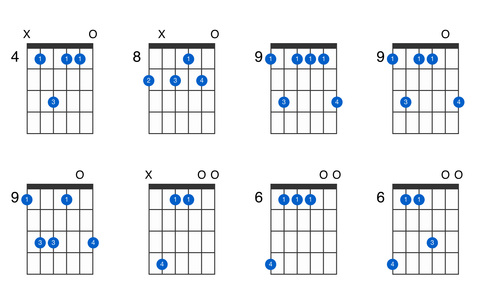
Basic guitar chords are combinations of notes played simultaneously to create harmony. These chords use open (unfretted) strings and notes pressed on the guitar's neck (fretted notes). They typically start with major, minor, and dominant seventh chords.
🎸 Gear Up to Master Those Chords
The right accessories make learning chords faster and more comfortable. Here's what every beginner needs:
- Muspor Finger Caps – Protect your fingertips while you build up calluses pressing those chord shapes.
- Guitar Capo (Aluminum Alloy) – Move chords up the neck to find a more comfortable key while you're learning.
- 360° Clip-On Tuner – Always practice chords in tune — it trains your ear from day one.
- Guitar Beginner Tools Pack – Capo, tuner, picks, strings, and a string changing tool — everything a chord-learning beginner needs in one kit.
Major Chords:
Major chords brighten up and stabilize music. They consist of three notes: the root, the note it's named after; the major third, which sounds full and positive; and the perfect fifth, which completes the chord and adds depth. Here are some examples and how they're made:
- A Major:
- Formation: Place your index finger on the second fret of the fourth string (D string), your middle finger on the second fret of the third string (G string), and your ring finger on the second fret of the second string (B string). Strum from the fifth string down, avoiding the sixth string.
- Difficulty: Moderate. A major chord is relatively straightforward for beginners to learn due to its simple finger placement.
- A# (Bb) Major:
- Formation: Barre the first fret with your index finger across all six strings. Place your ring finger on the third fret of the fifth string (A string), your pinky on the third fret of the fourth string (D string), and your middle finger on the second fret of the third string (G string).
- Difficulty: Intermediate. The barre chord shape required for A# (Bb) major can be challenging for beginners due to the need for finger strength and proper positioning.
- B Major:
- Formation: Barre the second fret with your index finger across the fifth and sixth strings. Place your ring finger on the fourth fret of the fourth string (D string), your pinky on the fourth fret of the third string (G string), and your middle finger on the third fret of the second string (B string).
- Difficulty: Advanced. B major is one of the more challenging chords for beginners due to the full barre required and the stretching of fingers across multiple frets.
- C Major:
- Formation: Place your index finger on the first fret of the second string (B string), your middle finger on the second fret of the fourth string (D string), and your ring finger on the third fret of the fifth string (A string). Strum from the fifth string down, avoiding the sixth string.
- Difficulty: Easy. C major is often one of the first chords beginners learn due to its simple finger placement and the absence of barring.
- C# (Db) Major:
- Formation: Barre the fourth fret with your index finger across all six strings. Place your ring finger on the sixth fret of the fifth string (A string), your pinky on the sixth fret of the fourth string (D string), and your middle finger on the fifth fret of the third string (G string).
- Difficulty: Intermediate to Advanced. Similar to A# (Bb) major, C# (Db) major requires a full barre, which can be challenging for beginners.
- D Major:
- Formation: Place your index finger on the second fret of the third string (G string), your ring finger on the third fret of the second string (B string), and your middle finger on the second fret of the first string (high E string). Strum from the fourth string down.
- Difficulty: Easy to Moderate. D major is relatively easy to learn for beginners due to its straightforward finger placement and the absence of barring.
- D# (Eb) Major:
- Formation: Barre the sixth fret with your index finger across all six strings. Place your ring finger on the eighth fret of the fifth string (A string), your pinky on the eighth fret of the fourth string (D string), and your middle finger on the seventh fret of the third string (G string).
- Difficulty: Intermediate to Advanced. D# (Eb) major requires a full barre, making it challenging for beginners, especially due to the higher fret positioning.
- E Major:
- Formation: Place your index finger on the first fret of the third string (G string), your middle finger on the second fret of the fifth string (A string), and your ring finger on the second fret of the fourth string (D string). Strum all six strings.
- Difficulty: Easy. E major is one of the first chords beginners learn due to its simplicity and the absence of barring.
- F Major:
- Formation: Place your index finger on the first fret of the second string (B string), your middle finger on the second fret of the third string (G string), and your ring finger on the third fret of the fourth string (D string). Strum from the fourth string down, avoiding the fifth and sixth strings.
- Difficulty: Moderate. F major can be challenging for beginners due to the finger stretch required between the first and third frets.
- F# (Gb) Major:
- Formation: Barre the second fret with your index finger across all six strings. Place your ring finger on the fourth fret of the fifth string (A string), your pinky on the fourth fret of the fourth string (D string), and your middle finger on the third fret of the third string (G string).
- Difficulty: Intermediate. F# (Gb) major requires a full barre, which may be challenging for beginners, particularly due to the finger stretch between the second and fourth frets.
- G Major:
- Formation: Place your index finger on the second fret of the fifth string (A string), your middle finger on the third fret of the sixth string (low E string), and your ring finger on the third fret of the first string (high E string). Strum all six strings.
- Difficulty: Easy to Moderate. G major is relatively easy for beginners due to its simple finger placement, although some may find stretching to the third fret challenging initially.
- G# (Ab) Major:
- Formation: Barre the fourth fret with your index finger across all six strings. Place your ring finger on the sixth fret of the fifth string (A string), your pinky on the sixth fret of the fourth string (D string), and your middle finger on the fifth fret of the third string (G string).
- Difficulty: Intermediate to Advanced. G# (Ab) major requires a full barre, making it more challenging for beginners, especially due to the higher fret positioning.
Minor Chords:

Minor chords create a gloomier and sadder mood than major chords. They are made up of the root note, a minor third (two half steps above the root), and a perfect fifth (three-and-a-half steps above the root). Here are some examples of minor chords:
- A Minor:
- Formation: Place your index finger on the first fret of the second string (B string), your middle finger on the second fret of the fourth string (D string), and your ring finger on the second fret of the third string (G string). Strum from the fifth string down, avoiding the sixth string.
- Difficulty: Easy. A minor is often one of the first chords beginners learn due to its simple finger placement and the absence of barring.
- A# (Bb) Minor:
- Formation: Barre the first fret with your index finger across all six strings. Place your ring finger on the third fret of the fifth string (A string), your pinky on the third fret of the fourth string (D string), and your middle finger on the second fret of the third string (G string).
- Difficulty: Intermediate. The barre chord shape required for A# (Bb) minor can be challenging for beginners due to the need for finger strength and proper positioning.
- B Minor:
- Formation: Place your index finger on the second fret of the fifth string (A string), your middle finger on the third fret of the sixth string (low E string), and your ring finger on the fourth fret of the fourth string (D string). Strum all six strings.
- Difficulty: Intermediate. B minor requires a full barre, making it challenging for beginners, especially due to the finger stretch across multiple frets.
- C Minor:
- Formation: Barre the third fret with your index finger across all six strings. Place your ring finger on the fifth fret of the fifth string (A string), your pinky on the fifth fret of the fourth string (D string), and your middle finger on the fourth fret of the third string (G string).
- Difficulty: Intermediate to Advanced. C minor requires a full barre, which can be challenging for beginners due to the need for finger strength and proper positioning.
- C# (Db) Minor:
- Formation: Barre the fourth fret with your index finger across all six strings. Place your ring finger on the sixth fret of the fifth string (A string), your pinky on the sixth fret of the fourth string (D string), and your middle finger on the fifth fret of the third string (G string).
- Difficulty: Intermediate to Advanced. Similar to C minor, C# (Db) minor requires a full barre, making it challenging for beginners, especially due to the higher fret positioning.
- D Minor:
- Formation: Place your index finger on the first fret of the first string (high E string), your middle finger on the second fret of the third string (G string), and your ring finger on the third fret of the second string (B string). Strum from the fourth string down, avoiding the fifth and sixth strings.
- Difficulty: Easy to Moderate. D minor is relatively easy to learn for beginners due to its straightforward finger placement and the absence of barring.
- D# (Eb) Minor:
- Formation: Barre the sixth fret with your index finger across all six strings. Place your ring finger on the eighth fret of the fifth string (A string), your pinky on the eighth fret of the fourth string (D string), and your middle finger on the seventh fret of the third string (G string).
- Difficulty: Intermediate to Advanced. D# (Eb) minor requires a full barre, making it challenging for beginners, especially due to the higher fret positioning.
- E Minor:
- Formation: Place your index finger on the second fret of the fifth string (A string), your middle finger on the second fret of the fourth string (D string), and your ring finger on the second fret of the third string (G string). Strum all six strings.
- Difficulty: Easy. E minor is one of the first chords beginners learn due to its simplicity and the absence of barring.
- F Minor:
- Formation: Barre the first fret with your index finger across all six strings. Place your ring finger on the third fret of the fifth string (A string), your pinky on the third fret of the fourth string (D string), and your middle finger on the second fret of the third string (G string).
- Difficulty: Intermediate. F minor can be challenging for beginners due to the barre required and the finger stretch across multiple frets.
- F# (Gb) Minor:
- Formation: Barre the second fret with your index finger across all six strings. Place your ring finger on the fourth fret of the fifth string (A string), your pinky on the fourth fret of the fourth string (D string), and your middle finger on the third fret of the third string (G string).
- Difficulty: Intermediate. Similar to F minor, F# (Gb) minor requires a barre and finger stretch, making it challenging for beginners.
- G Minor:
- Formation: Barre the third fret with your index finger across all six strings. Place your ring finger on the fifth fret of the fifth string (A string), your pinky on the fifth fret of the fourth string (D string), and your middle finger on the fourth fret of the third string (G string).
- Difficulty: Intermediate to Advanced. G minor requires a full barre, which can be challenging for beginners due to the need for finger strength and proper positioning.
- G# (Ab) Minor:
- Formation: Barre the fourth fret with your index finger across all six strings. Place your ring finger on the sixth fret of the fifth string (A string), your pinky on the sixth fret of the fourth string (D string), and your middle finger on the fifth fret of the third string (G string).
- Difficulty: Intermediate to Advanced. G# (Ab) minor requires a full barre, making it challenging for beginners, especially due to the higher fret positioning. The finger stretch and proper finger pressure are essential to ensure all strings sound clear. Practice slowly and gradually increase speed to master this chord.
🎸 Gear Up to Master Those Chords
The right accessories make learning chords faster and more comfortable. Here's what every beginner needs:
- Muspor Finger Caps – Protect your fingertips while you build up calluses pressing those chord shapes.
- Guitar Capo (Aluminum Alloy) – Move chords up the neck to find a more comfortable key while you're learning.
- 360° Clip-On Tuner – Always practice chords in tune — it trains your ear from day one.
- Guitar Beginner Tools Pack – Capo, tuner, picks, strings, and a string changing tool — everything a chord-learning beginner needs in one kit.
Dominant Seventh Chords:
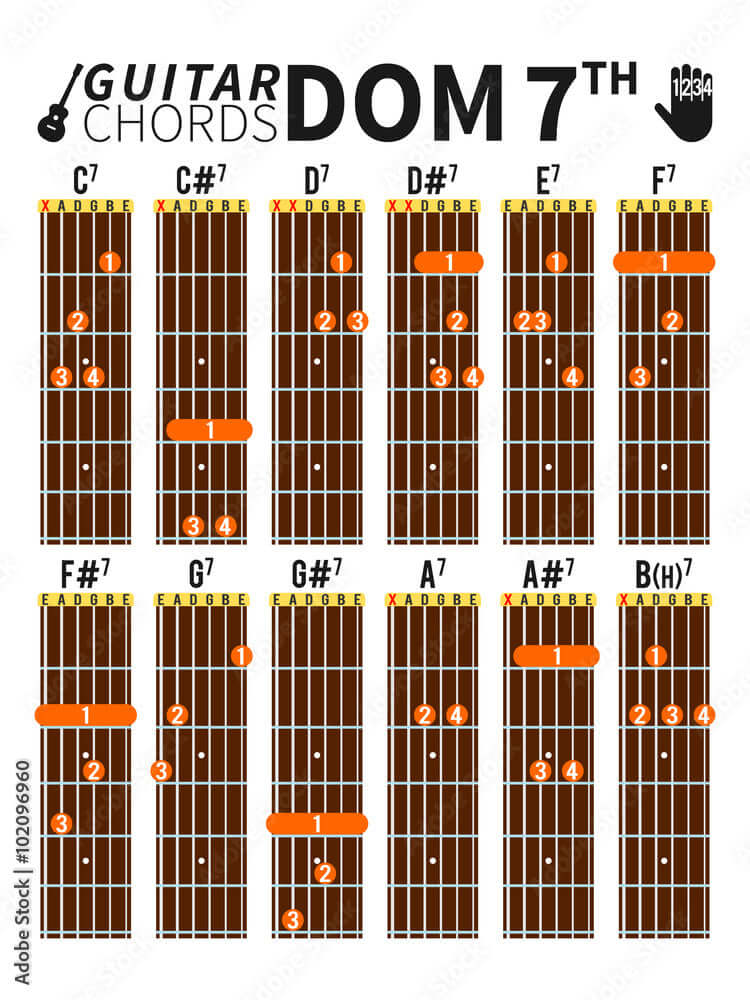
Dominant seventh chords add drama and release to music, making them valuable for creating chord progressions with impact. They are created by taking a major chord and adding a note that is a minor seventh interval away. Here are some examples of common dominant seventh chords:
- A7:
- Formation: Place your index finger on the first fret of the third string (G string), your middle finger on the second fret of the fourth string (D string), and your ring finger on the second fret of the second string (B string). Strum from the fifth string down, avoiding the sixth string.
- Difficulty: Easy to Moderate. A7 is relatively easy to learn for beginners due to its straightforward finger placement and the absence of barring.
- A#7 (Bb7):
- Formation: Barre the first fret with your index finger across all six strings. Place your ring finger on the third fret of the fifth string (A string), your pinky on the third fret of the fourth string (D string), and your middle finger on the second fret of the third string (G string).
- Difficulty: Intermediate. The barre chord shape required for A#7 (Bb7) can be challenging for beginners due to the need for finger strength and proper positioning.
- B7:
- Formation: Barre the second fret with your index finger across the fifth and sixth strings. Place your ring finger on the fourth fret of the fourth string (D string), your middle finger on the third fret of the third string (G string), and your pinky on the fourth fret of the second string (B string).
- Difficulty: Intermediate to Advanced. B7 requires a partial barre, making it challenging for beginners, especially due to the finger stretch across multiple frets.
- C7:
- Formation: Place your index finger on the first fret of the first string (high E string), your middle finger on the second fret of the fourth string (D string), and your ring finger on the third fret of the fifth string (A string). Strum from the fourth string down, avoiding the sixth string.
- Difficulty: Easy. C7 is relatively easy for beginners due to its simple finger placement and the absence of barring.
- C#7 (Db7):
- Formation: Barre the fourth fret with your index finger across all six strings. Place your ring finger on the sixth fret of the fifth string (A string), your pinky on the sixth fret of the fourth string (D string), and your middle finger on the fifth fret of the third string (G string).
- Difficulty: Intermediate to Advanced. Similar to A#7 (Bb7), C#7 (Db7) requires a full barre, making it challenging for beginners due to the need for finger strength and proper positioning.
- D7:
- Formation: Place your index finger on the first fret of the second string (B string), your middle finger on the second fret of the third string (G string), and your ring finger on the second fret of the first string (high E string). Strum from the fourth string down.
- Difficulty: Easy to Moderate. D7 is relatively easy to learn for beginners due to its straightforward finger placement and the absence of barring.
- D#7 (Eb7):
- Formation: Barre the sixth fret with your index finger across all six strings. Place your ring finger on the eighth fret of the fifth string (A string), your pinky on the eighth fret of the fourth string (D string), and your middle finger on the seventh fret of the third string (G string).
- Difficulty: Intermediate to Advanced. D#7 (Eb7) requires a full barre, making it challenging for beginners, especially due to the higher fret positioning.
- E7:
- Formation: Place your index finger on the first fret of the third string (G string), your middle finger on the second fret of the fifth string (A string), and your ring finger on the second fret of the fourth string (D string). Strum all six strings.
- Difficulty: Easy. E7 is one of the first chords beginners learn due to its simplicity and the absence of barring.
- F7:
- Formation: Barre the first fret with your index finger across all six strings. Place your ring finger on the third fret of the fifth string (A string), your pinky on the third fret of the fourth string (D string), and your middle finger on the second fret of the third string (G string).
- Difficulty: Intermediate. F7 can be challenging for beginners due to the barre required and the finger stretch across multiple frets.
- F#7 (Gb7):
- Formation: Barre the second fret with your index finger across all six strings. Place your ring finger on the fourth fret of the fifth string (A string), your pinky on the fourth fret of the fourth string (D string), and your middle finger on the third fret of the third string (G string).
- Difficulty: Intermediate. Similar to F7, F#7 (Gb7) requires a barre and finger stretch, making it challenging for beginners.
- G7:
- Formation: Place your index finger on the first fret of the first string (high E string), your middle finger on the second fret of the fifth string (A string), your ring finger on the second fret of the third string (G string), and your pinky on the third fret of the sixth string (low E string).
- Difficulty: Easy to Moderate. G7 is relatively easy for beginners due to its simple finger placement and the absence of barring.
- G#7 (Ab7):
- Formation: Barre the fourth fret with your index finger across all six strings. Place your ring finger on the sixth fret of the fifth string (A string), your pinky on the sixth fret of the fourth string (D string), and your middle finger on the fifth fret of the third string (G string).
- Difficulty: Intermediate to Advanced. G#7 (Ab7) requires a full barre, making it challenging for beginners, especially due to the higher fret positioning. Practice slowly and gradually increase speed to master this chord.
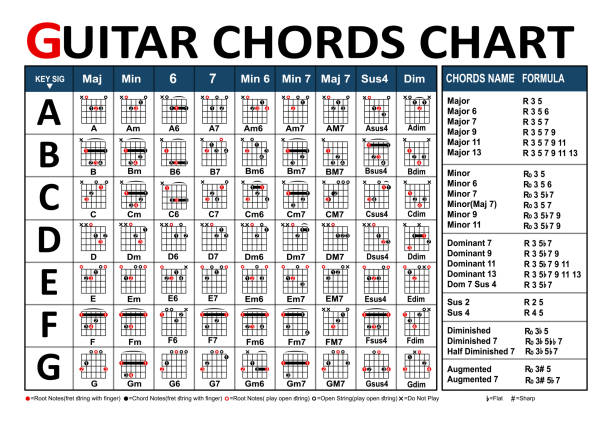
There are additional types of chords beyond major, minor, and dominant 7th chords. Let's elaborate on these chords in a similar pattern:
Major 7th (maj7) Chords:

Formation: A major 7th chord is formed by adding the major 7th interval to a major chord. For example, in a Cmaj7 chord, you would play a C major chord (C-E-G) and add the major 7th note (B) to it.
Difficulty: Moderate. Major 7th chords can be a bit more challenging for beginners due to the additional finger placement required to add the major 7th interval.
Minor 7th (m7) Chords:
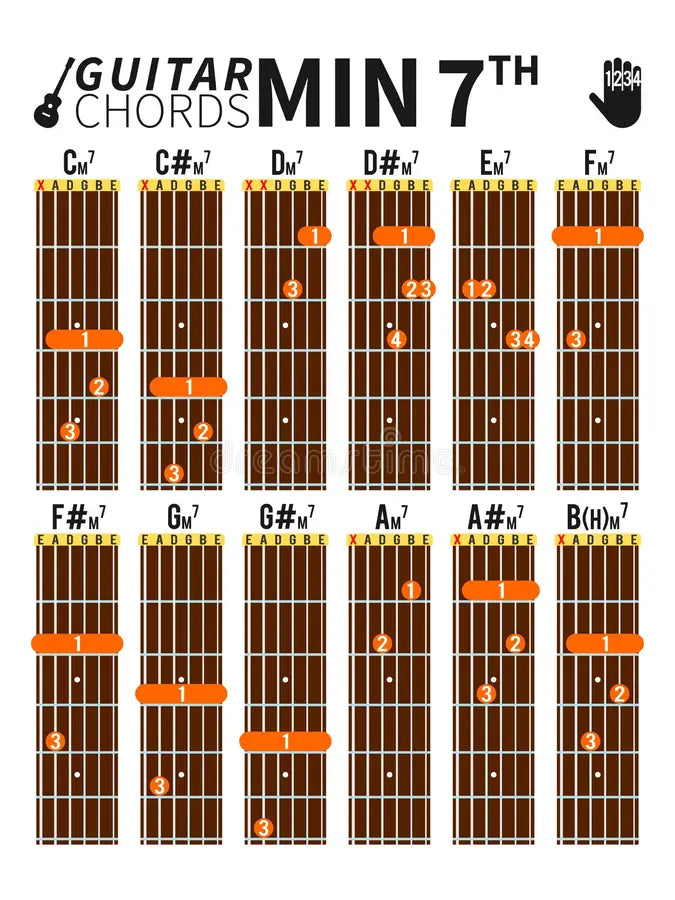
Formation: A minor 7th chord is formed by adding the minor 7th interval to a minor chord. For example, in a Dm7 chord, you would play a D minor chord (D-F-A) and add the minor 7th note (C) to it.
Difficulty: Moderate. Minor 7th chords are similar in difficulty to major 7th chords, requiring additional finger placement to add the minor 7th interval.
Diminished (dim) Chords:
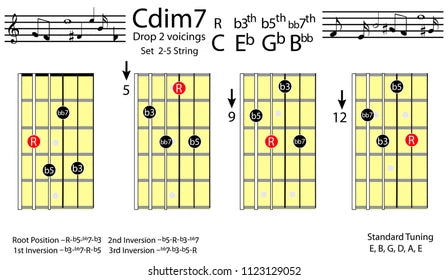
Formation: Diminished chords are formed by stacking minor 3rd intervals. For example, a Cdim chord consists of the notes C-Eb-Gb.
Difficulty: Moderate. Diminished chords can be challenging for beginners due to their dissonant sound and less common usage compared to major and minor chords.
Augmented (aug) Chords:
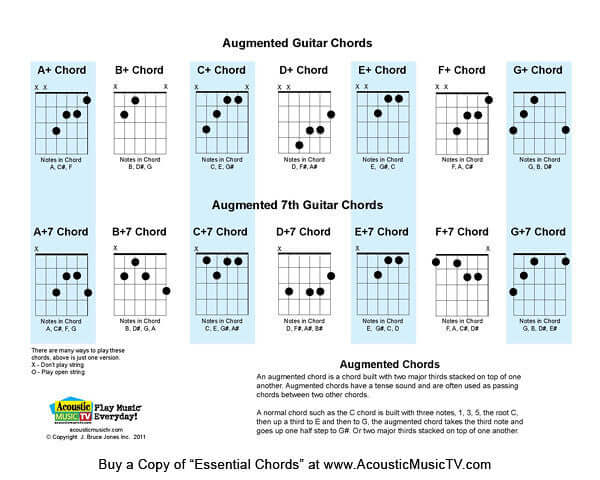
Formation: Augmented chords are formed by stacking major 3rd intervals. For example, a Caug chord consists of the notes C-E-G#.
Difficulty: Moderate. Augmented chords are less common than major and minor chords, so beginners may find them slightly more challenging to incorporate into their playing.
Sus2 (sus2) Chords:
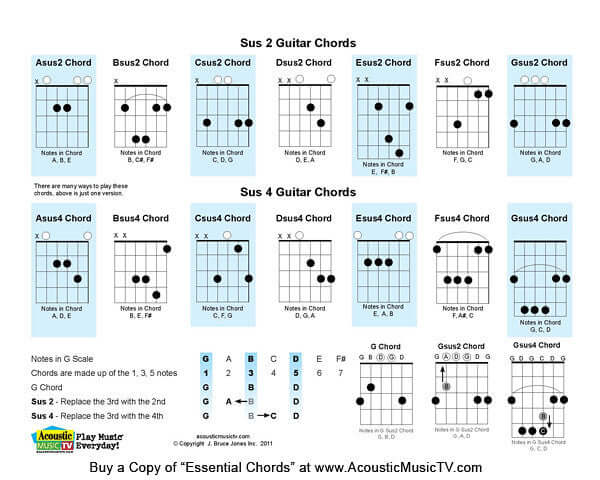
Formation: Suspended 2nd chords are formed by replacing the third of a major or minor chord with the second. For example, a Csus2 chord consists of the notes C-D-G.
Difficulty: Easy to Moderate. Sus2 chords are relatively easy to learn due to their similarity to major and minor chords, but beginners may need to adjust to the sound of the added second interval.
Sus4 (sus4) Chords:
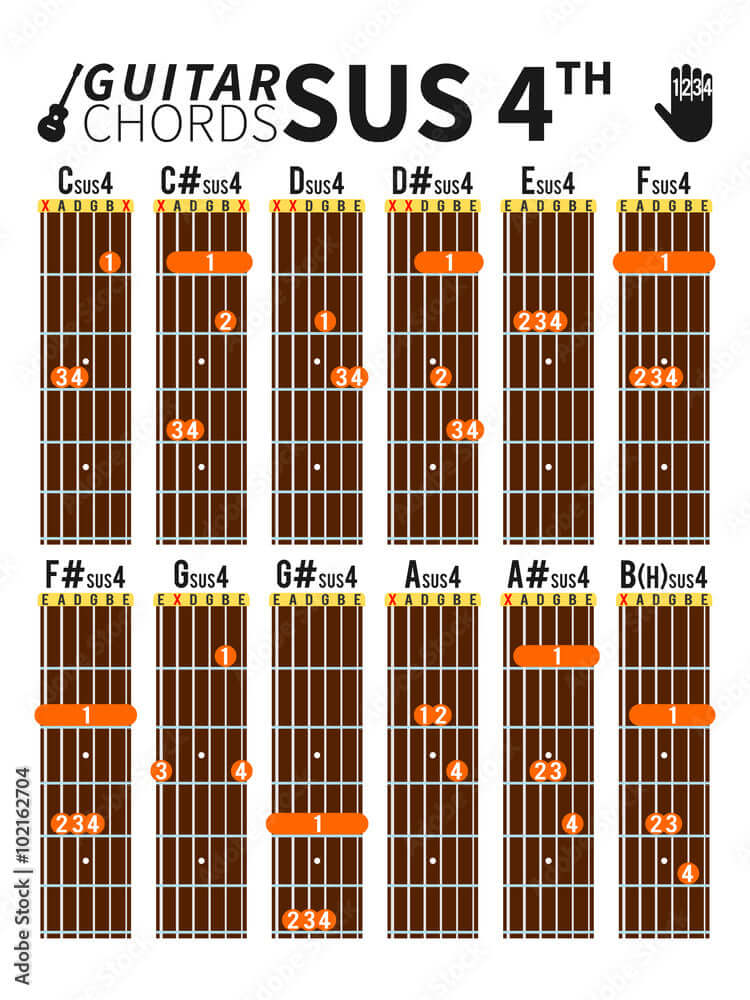
Formation: Suspended 4th chords are formed by replacing the third of a major or minor chord with the fourth. For example, a Dsus4 chord consists of the notes D-G-A.
Difficulty: Easy to Moderate. Sus4 chords are similar in difficulty to sus2 chords and are relatively easy for beginners to learn.
Major 6th (maj6) Chords:
Formation: A major 6th chord is formed by adding the major 6th interval to a major chord. For example, in a Gmaj6 chord, you would play a G major chord (G-B-D) and add the major 6th note (E) to it.
Difficulty: Moderate. Major 6th chords are slightly more challenging for beginners due to the additional finger placement required for the major 6th interval.
Minor 6th (m6) Chords:
Formation: A minor 6th chord is formed by adding the major 6th interval to a minor chord. For example, in an Am6 chord, you would play an A minor chord (A-C-E) and add the major 6th note (F#) to it.
Difficulty: Moderate. Minor 6th chords are similar in difficulty to major 6th chords and may pose a slight challenge for beginners.
Dominant 9th (9) Chords:
Formation: A dominant 9th chord is formed by adding the major 9th interval to a dominant 7th chord. For example, in a G9 chord, you would play a G7 chord (G-B-D-F) and add the major 9th note (A) to it.
Difficulty: Moderate to Advanced. Dominant 9th chords require additional finger placement and are more complex harmonically, making them challenging for beginners to master.
Minor 9th (m9) Chords:
Formation: A minor 9th chord is formed by adding the major 9th interval to a minor 7th chord. For example, in a Dm9 chord, you would play a Dm7 chord (D-F-A-C) and add the major 9th note (E) to it.
Difficulty: Moderate to Advanced. Minor 9th chords are similar in difficulty to dominant 9th chords and may pose a challenge for beginners due to their complexity.
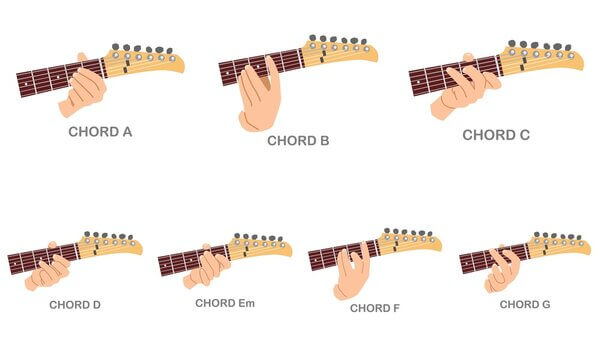
Playing Basic Guitar Chords:
Playing basic guitar chords effectively requires proper technique and practice. Here are some steps to help you get started:
- Finger Placement:
To play chords correctly, use the chord diagram or tablature as a guide to place your fingers on the fretboard. Make sure each finger is positioned precisely to prevent accidentally silencing nearby strings.
- Pressing Down Firmly:
To play the guitar effectively, press down on the strings with your fingertips firmly enough to create crisp and resonant notes. Try adjusting the position of your fingers on the fretboard until you discover the technique that feels most comfortable and allows you to play chords efficiently.
- Strumming or Picking:
When your fingers are placed on the guitar, use your strumming hand to play the strings. You can either strum across all the strings together or pick each string one at a time. Make sure to keep a steady beat and play the chords evenly.
- Practice, Practice, Practice:
Regular practice is crucial for learning basic guitar chords. Begin with simple chord sequences and progressively challenge yourself with more intricate ones as you get better. Establish a specific practice routine daily to build muscle memory and smooth chord transitions.
🎸 Gear Up to Master Those Chords
The right accessories make learning chords faster and more comfortable. Here's what every beginner needs:
- Muspor Finger Caps – Protect your fingertips while you build up calluses pressing those chord shapes.
- Guitar Capo (Aluminum Alloy) – Move chords up the neck to find a more comfortable key while you're learning.
- 360° Clip-On Tuner – Always practice chords in tune — it trains your ear from day one.
- Guitar Beginner Tools Pack – Capo, tuner, picks, strings, and a string changing tool — everything a chord-learning beginner needs in one kit.
Tips for Enhancing Your Chord-Playing Skills:

To further enhance your chord-playing skills and add burstiness to your playing, consider the following tips:
- Experiment with Different Voicings:
Try out different fingerings and ways of playing basic chords to create fresh sounds and textures. By experimenting with how you move the chords around and change them up, you can give your chord progressions more depth and richness.
- Learn Common Chord Progressions:
Get to know the chord progressions that are commonly used in popular music. By learning how chords relate to each other and how they work together in a progression, you'll deepen your understanding of music and improve your ability to improvise.
- Practice Chord Transitions:
Make sure the transitions between chords are smooth and fluid. Start by practicing slowly and gradually speed up as you get more confident. Identify the sections that are challenging and focus on them until you can play them effortlessly.
- Play Along with Songs:
Enhance your chord-playing abilities by accompanying your favorite tunes. Start with songs featuring straightforward chord sequences and gradually challenge yourself with more intricate arrangements. Practicing with recordings not only improves your timing but also develops your ear and overall musicianship.
FAQs:
Q1: How long does it take to master basic guitar chords?
A: The time it takes to master basic guitar chords varies from person to person and depends on factors such as practice frequency, individual aptitude, and dedication. With consistent practice and patience, most beginners can expect to become proficient in basic chords within a few weeks to a few months.
Q2: How often should I practice basic guitar chords?
A: Aim to practice basic guitar chords for at least 20-30 minutes each day. Consistency is key to building muscle memory and improving chord transitions.
Q3: Can I learn basic guitar chords without a teacher?
A: While having a teacher can be beneficial, many resources such as online tutorials, books, and instructional videos are available for self-learning. With dedication and persistence, you can learn basic guitar chords independently.
Q4: How do I know if I'm playing a chord correctly?
A: Pay attention to the sound produced when you strum the chord. If any notes sound muted or buzzing, adjust your finger placement and pressure until all notes ring out clearly.
Q5: Should I use a pick or my fingers to strum chords?
A: Both methods are commonly used in guitar playing. Experiment with both techniques to find which one feels more comfortable and produces the sound you desire.
Q6: What is the best way to memorize chord fingerings?
A: Repetition and visualization are key to memorizing chord fingerings. Practice transitioning between chords slowly and visualize the finger placement in your mind.
Q7: Are there shortcuts to learning basic guitar chords?
A: While there are no shortcuts to mastering guitar chords, using mnemonic devices or chord charts can aid in memorization and speed up the learning process.
Q8: How can I improve my chord transitions?
A: Focus on practicing smooth transitions between chords, starting with simple progressions and gradually increasing complexity. Use a metronome to practice timing and maintain a steady tempo.
Q9: Should I learn all basic guitar chords at once?
A: It's recommended to start with a few basic chords and gradually add more to your repertoire as you become comfortable. Focus on mastering one chord at a time before moving on to the next.
Q10: What should I do if I'm struggling to play certain chords?
A: Break down the chord into individual finger placements and practice each one separately. Gradually work on bringing all fingers together to form the chord shape.
Conclusion:
To become a proficient guitarist, mastering foundational chords is paramount. Comprehend their importance, hone your playing technique, and employ effective tips to enhance your chord-playing abilities. With dedication and practice, you'll transform your chord-playing skills, enabling you to effortlessly play your favorite melodies with finesse and assurance.
Author bio:

Dr. Robin Alexander
Dr. Robin Alexander, an MD Pathologist and passionate guitarist, combines his love for music and science. As a guitar enthusiast, he shares valuable insights and tips on guitar playing here at Guitarmetrics, helping musicians enhance their skills and enjoy their musical journey.


